
Submitted by Rocks 'n' Roots on
![]()
Concrete landscape borders can be a decorative, functional and affordable addition to your yard or garden. Poured-in-place concrete borders are perfect for lawn edging, tree surrounds, driveway curbs and garden borders. Concrete borders are also very versatile and can be designed and built to match any landscape contour and they will last for years.
Fiber-reinforced, QUIKRETE® Crack Resistant Concrete is the ideal product for the job and for a personal touch add one of five QUIKRETE® Liquid Cement Colors to the mix. Liquid Cement Color is available in red, brown, buff, charcoal and terra cotta; one 10 oz bottle will color up to two 80 lb bags of QUIKRETE® Concrete Mix.
QUIK-DATA
Tools & Materials Saw, hammer, ¼”x4”x8” plywood, wood stakes, 1” wood screws, drill with screw bit, wood float, mixing hoe, shovel, margin trowel, edging tool, 1’x1’ mixing tub, Crack Resistant Concrete, 10 oz Liquid Cement Color, Acrylic Concrete Cure & Seal and a bucket.
Concrete landscape borders can be a decorative, functional and affordable addition to your yard or garden. Poured-in-place concrete borders are perfect for lawn edging, tree surrounds, driveway curbs and garden borders. Concrete borders are also very versatile and can be designed and built to match any landscape contour and they will last for years.
Fiber-reinforced, QUIKRETE® Crack Resistant Concrete is the ideal product for the job and for a personal touch add one of five QUIKRETE® Liquid Cement Colors to the mix. Liquid Cement Color is available in red, brown, buff, charcoal and terra cotta; one 10 oz bottle will color up to two 80 lb bags of QUIKRETE® Concrete Mix.
Step-By-Step Instructions
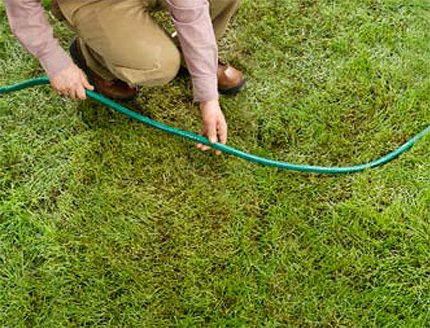
1. Lay out the project. Using a garden hose or rope, lay out the border design contour. The border width should be a minimum of 5".
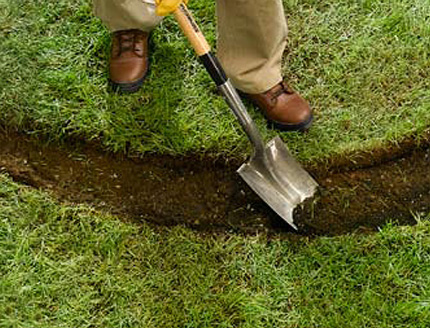
2. Excavate the border layout to an 8" width and 4" depth. Compact the soil to create a solid base for the concrete border.
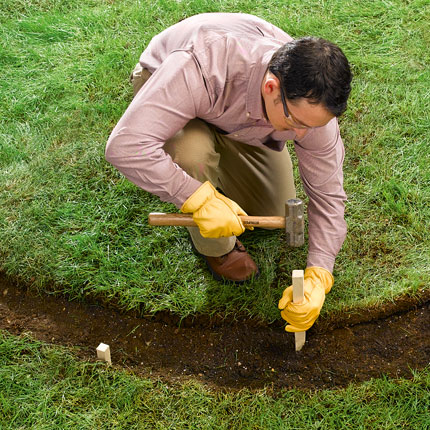
3. Steak the contours. Drive 1 x 1 x 12" wood stakes at 18" intervals along the contours of the curved border.
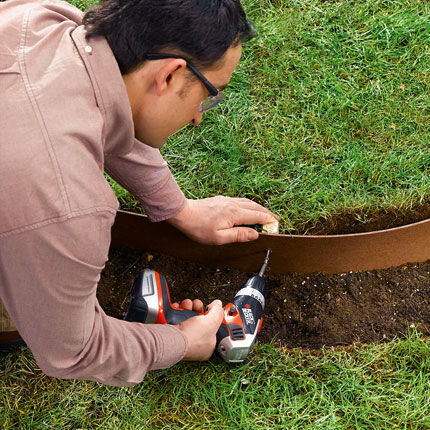
4. Attach curved forms. Use 1/4 x 4 x 8" flexible hardboard or plywood to the wood stakes using 1" wood screws.
5. Anchor the forms. Cut 1 x 1" boards in lengths equal to the width of the border for use as spacers. Set 1 x 1 x 12" wood stakes along the outside contour of the border layout in 3-ft. intervals. Use 1 x 1" spacers placed along the bottom edge of the hardboard form to maintain consistent border width.
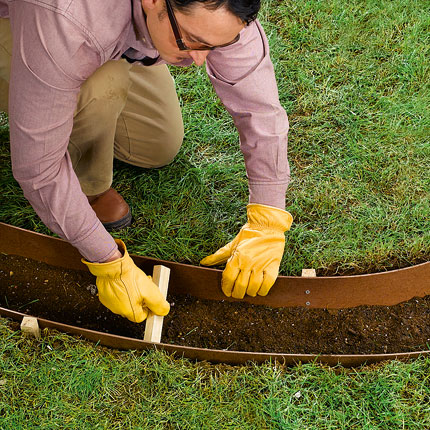
6. Pour the concrete. Mix concrete to a firm workable consistency and pour into the border form. Use a margin trowel to spread and consolidate the mix.
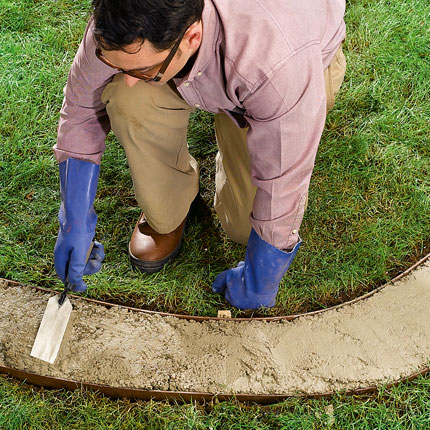
7. Tool the concrete. Once the bleed water has disappeared, smooth the surface with a wood float. Using a margin trowel, cut control joints a minimum of 1" deep into the concrete at 3-ft. intervals. Consolidate and smooth the border edges using a concrete edging tool.
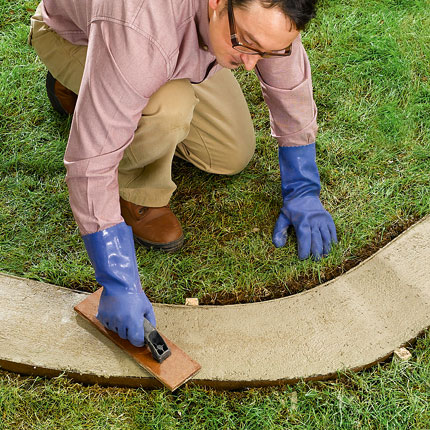
8. Seal the concrete. Apply acrylic concrete sealer to the concrete and let it cure for three to five days before removing the forms. Backfill against the lawn border with sod or dirt.

Posting by Quikrete: https://www.quikrete.com/
Additional information can be found at: https://www.quikrete.com/athome/projectinstructions.asp